Before running
There are multiple options for using the bot.
You can either choose to use:
- A Twitter archive
- An RSS feed
- Guest tokens without a Developer account
- Twitter tokens with a Developer account
You'll need to create a configuration file and obtain the Fediverse tokens for your accounts no matter what you choose to use.
Guest tokens
If you prefer not applying for a Twitter developer account or want to get up and running as soon as possible, you can opt to use just Guest tokens for retrieving tweets and profile info from Twitter.
The bot will automatically obtain them on its own when no twitter_token mapping is found on your config file.
It has certain limitations, however:
- You'll have no access to tweets from protected accounts
To get started with Guest Tokens you'll just need to:
- obtain the Fediverse tokens
- and create a configuration file.
Twitter tokens
Not needed if using an archive, an RSS feed or Guest Tokens
You can obtain your Twitter bearer token by applying for a Twitter developer account.
The process involves some review of the developer account application by Twitter and it's very likely you'll be asked for some details pertaining your usecase. It usually doesn't take longer than a day or two to complete the application, the back and forth is mostly automated on their part.
Additionally, Twitter introduced a new tier of access (Elevated) to their API projects and although existing projects (before Nov 2021) were promoted automatically, new users will only get Essential access instead by default, in which requests to API v1.1 are disabled.
We still use v1.1 for downloading videos and profile banners, and as of now there is no available alternative in v2.
So, you'll need Elevated access for the bot to function properly when using Twitter Tokens until further notice.
You can apply for Elevated access here.
Once you have a Twitter developer account, you need to access your dashboard and create a new project (so your app has v2 access) and also create a new app associated to that new project.
Now, enter your new application "Keys and tokens" section, copy and safely store all of your tokens.
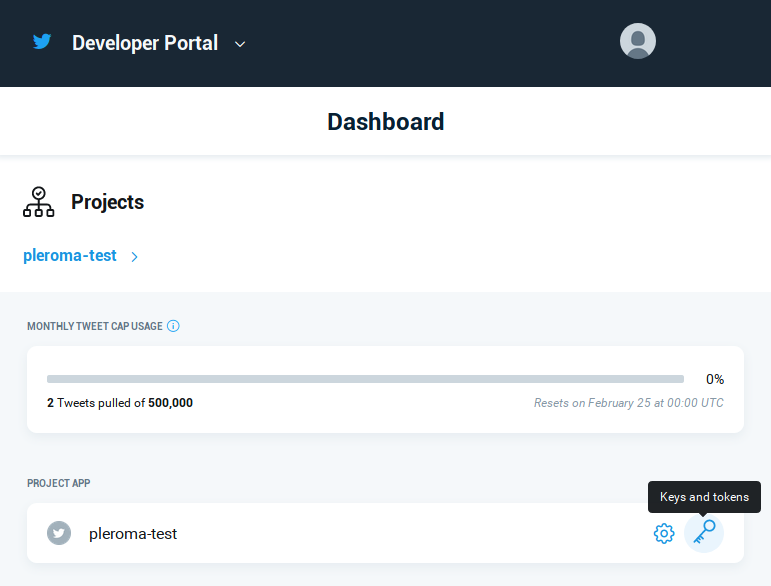
- The Bearer Token is usually enough for most usecases when running
pleroma-bot
However, if you plan on retrieving tweets from an account with protected tweets, you'll also need the following:
Keep in mind your Twitter developer account needs to follow or be the owner of the protected account for this to work
- Consumer Key and Secret (or API key & secret)
- Access Token Key and Secret
Alternatively, you can obtain the Access Token and Secret by running this locally, while being logged in with a Twitter account which follows or is the owner of the protected account.
Fediverse tokens
You will need to obtain the bearer tokens for the Fediverse account(s) you plan to use for mirroring.
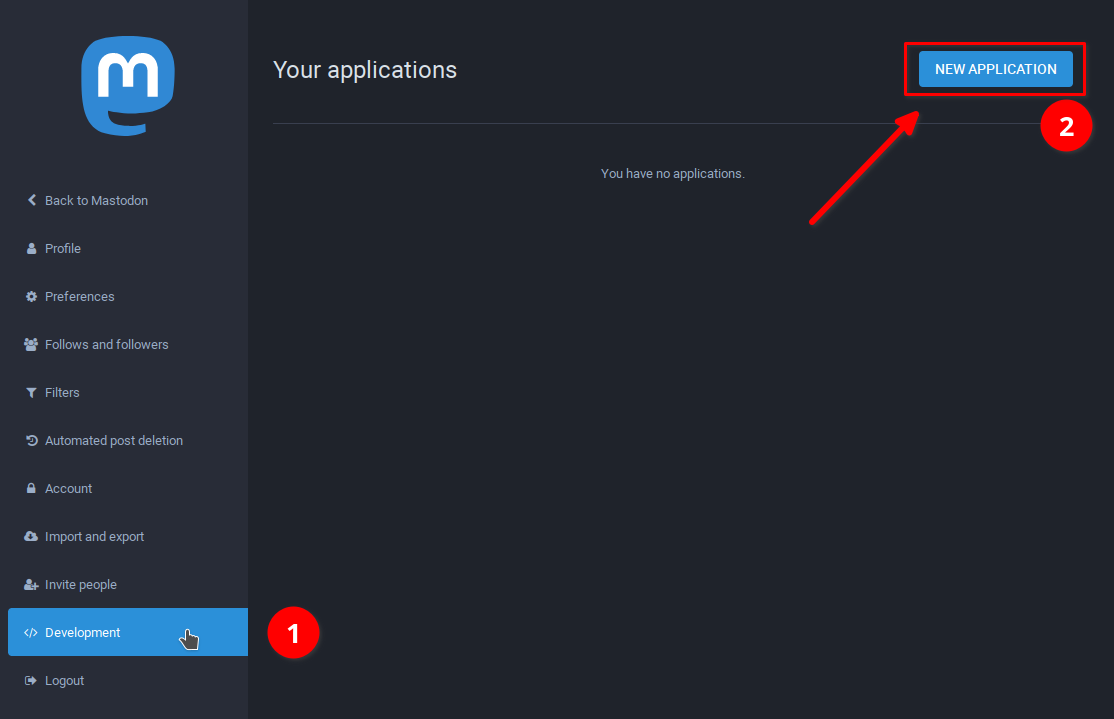
If you're using Mastodon, you can obtain a token by using the Web interface and navigating to Settings -> Development:
 * Scopes:
 read write
Save (and safely store) the value of the token generated for that Fediverse account, you'll need it in the next section.
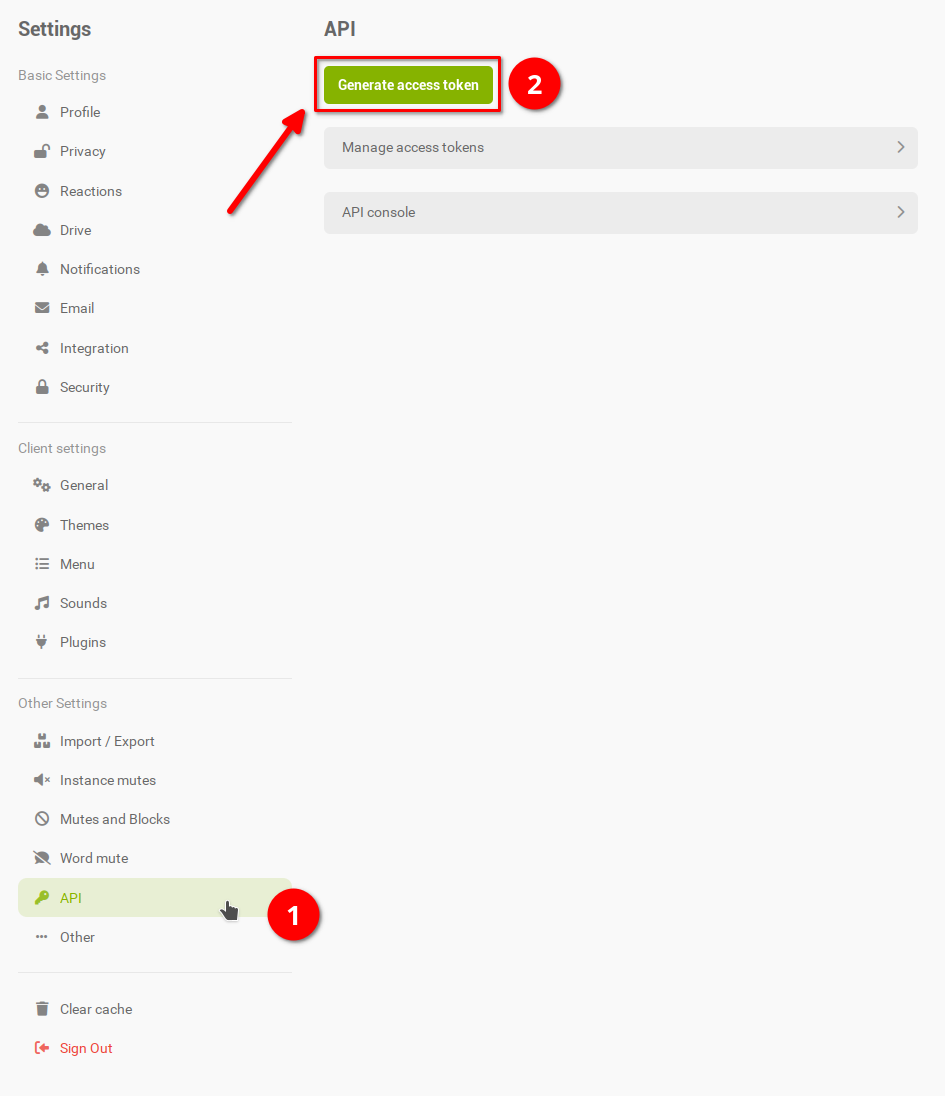
If you're using Misskey you can obtain a token using the Web interface and navigating to Settings -> API:
- Scopes:
- View your account information
- Edit your account information
- Access your Drive files and folders
- Edit or delete your Drive files and folders
- Compose or delete notes
Save (and safely store) the value of the token generated for that Fediverse account, you'll need it in the next section.
If you cannot get the token by using the Web interface (like in Pleroma instances), the alternative is to follow the instructions on this site while being logged in as the Fediverse account, and enter:
- Your server/instance URL (without the protocol at the beginning, e.g. https://)
- The name of your app (doesn't really matter which one you choose, it's just a meaningful name so it's easy for you to identify)
- Scopes:
read write
When you're done with the last step (as in, running the cURL command):
$ curl -F grant_type=authorization_code \
       -F redirect_uri=urn:ietf:wg:oauth:2.0:oob \
       -F client_id=XXXXXXXXXXXXXXXXXXXXXXXXXXXXXXXXX \
       -F client_secret=XXXXXXXXXXXXXXXXXXXXXXXXXXXXXXXXXXXXXXXXXXXX \
       -F code=XXXXXXXXXXXXXXXXXXXXXXXXXXXXXXXXXXXXX \
       -X POST https://yourinstance.fedi/oauth/token
{
    "access_token":"XXXXXXXXXXXXXXXXXXXXXXXXXXXXXXXXXXXXXXXX",
    "created_at":99999999,
    "expires_in":99999,
    "me":"https://yourinstance.fedi/users/yourfediuser",
    "refresh_token":"ZZZZZZZZZZZZZZZZZZZZZZZZZZZZZZZZZZZ",
    "scope":"read write",
    "token_type":"Bearer"
}
Save the value of access_token. That is the bearer token generated for that Fediverse account, you'll need it in the next section.